Install Preconfigured Demo
This method of installation is very convenient. This way you can install a pre-configured website similar to what is shown in demo by following some easy steps. You can only use this method if you are starting with fresh Drupal install.
We have used Back and Migrate drupal module to create database backup of demo website. In this section we will tell you how to setup our Drupal distribution and import the database snapshot to your website. This will install fresh Drupal with demo content and setting. Since demo content is only for demostration purpose and is not actual, you should delete of modify the content later.
Note: Only MySql database is supported to import demo database snapshot.
To begin the installation, follow these steps:
Extract the purchased
Extract the purchased package (seems you have already done it)
Go to folder
Go to folder where you have extracted files. You will see a folder named theme_with_demo_installation. Open this folder and you will see two files which are drupal_with_icompany.zip (drupal setup files) and InnoCompany-2012-10-11T08-28-16.mysql (database snapshot to be restored later on). Extract drupal_with_icompany.zip to your web server directory where you want to install your website.
Run the install script
To run the install script, point your browser to the base URL of your website where you have extracted drupal_with_icompany.zip. You should see installation screen like this: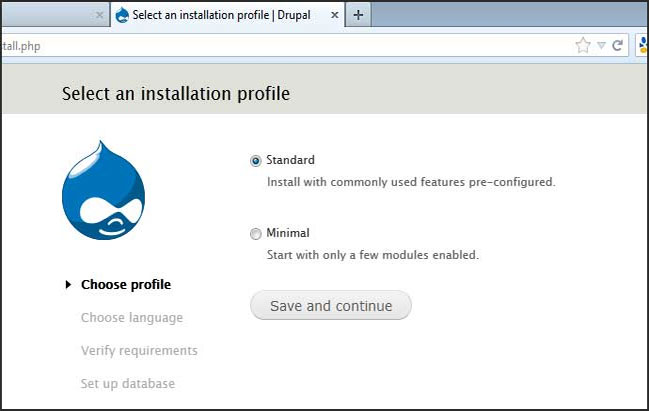
Save
Select Standard and click save and conntinue
Choose your language
On next screen choose your language (english is by default) and click save and continue
Enter Database Info
Now you will be asked your database name, database username and database password.Choose MySql as your database type and enter your database details. Do not use and table prefix. Click Save and continue and wait for drupal installation script to finish installation.
Enter Configuration Details
Installation script will ask some basic configuration information on screen like this: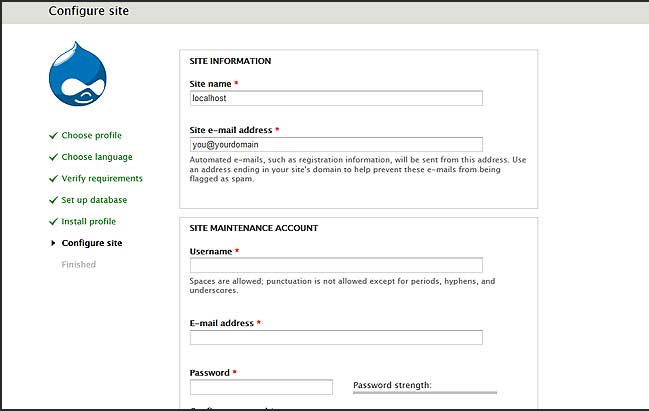
drupal is asking you to provide some basic site configuration options.Provide these information and click Save and continue and wait for installation to finish.
Later on when we import the demo database snapshot, these information will be overriden by information supplied in iCompany database snapshot. We will tell you what is overridden later on.
Your basic setup is complete. Do not modify anything at this moment. Next we will import the demo database snapshot which is very simple to do.
Restore Database
Go to Admin->configuration->media->file system and set Private file system path to sites/default/private/files. Also make sure your temporary file system path is correctly set (typically this is /tmp on linux server)
Go to Admin->modules, scroll down and enable Backup and Migrate module.
Go to Admin->configuration->backup and migrate then click on Restore tab
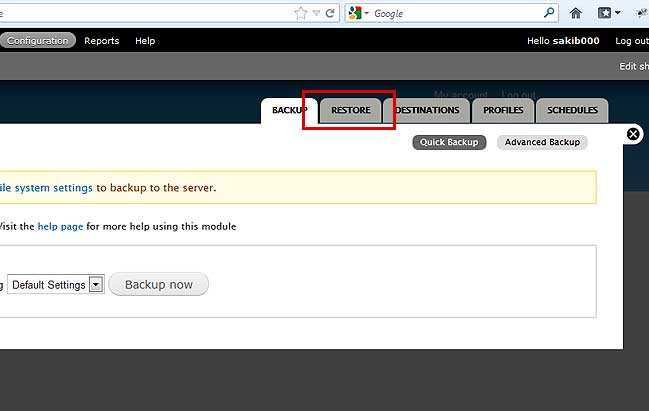
On the restoration screen, browse to InnoCompany-2012-10-11T08-28-16.mysql located in *package/theme_with_demo_installation and click *Restore now.
Note: database file is larger than 1 MB. If your server setting limits file upload size to less than database file size, you can imported compressed version of database which is located in theme_with_demo_installation/compressed_database/ *folder.
After restoration is finished, your website is ready*.* Your basic site information such as site name, admin username and password has been changed.
Set admin settings
Now your admin username and password is set to worthapost and worthapost respectively.
Its very important that you change your admin login credential at this moment.
You should also change your site name and slogan etc by visiting admin->configuration->site information. Make sure you /sites/default/settings.php is set to read only mode on your web server.
Setup is complete.
It is also recommended that you make sure that your file system path is properly set, specially the tmpdirectory. After restoring the database snapshot in previous step, temporary directory must have been reset to D:/wamp/tmp which was my setting. You should change it to your system setting for example /tmp on linux server.